
Written by:James Whitaker
We have all been there. You plug your phone in before bed, expecting to wake up to a crisp 100% battery, only to find it sitting at a dismal 12% in the morning. Panic sets in. Is the battery dead? Did the charger break? Is my phone a lost cause?
Before you rush out to spend hundreds on a new device or a battery replacement, take a breath. In my years of experience in the tech repair industry, I’ve seen thousands of phones come across the repair bench with “charging issues.” Surprisingly, a massive chunk of them—perhaps 30% to 40%—didn’t need a repair at all. They just needed a bath.
Your phone lives in dangerous places: lint-filled pockets, dusty handbags, and crumb-laden cup holders. Over time, that debris gets packed into the charging port, creating a physical barrier between your charger and the delicate gold pins inside the phone.
However, cleaning it isn’t as simple as jamming a safety pin inside and digging around. That is the fastest way to destroy your device permanently.
In this guide, brought to you by the team at Mobile Fix Experts, I’m going to walk you through exactly how to clean your charging port safely. We will cover the tools you need, the tools you must avoid, and what to do if cleaning doesn’t solve the problem.
Disclaimer: This guide involves physical maintenance of electronic devices. While cleaning is generally safe if done correctly, improper technique can cause damage. Proceed with caution.
Section 1: The “Invisible” Problem – Anatomy of a Dirty Port
Before we start poking around inside your expensive smartphone, it is vital to understand what we are dealing with. Why does dust stop a phone from charging, and why is it so risky to clean?
The Compaction Effect
It’s rarely a single crumb that causes the issue. It is usually a slow accumulation of pocket lint, dust, and pet hair. Every time you plug your lightning or USB-C cable in, you are effectively acting like a hydraulic press. You push that loose lint down to the very bottom of the port.
Eventually, that layer of lint becomes a hard, compacted “puck” at the bottom of the port. This puck prevents the charging cable from clicking all the way in. If your cable feels loose, or if it doesn’t make that satisfying “snap” when you plug it in, you are likely a victim of the Compaction Effect.
USB-C vs. Lightning: Know Your Enemy
Not all charging ports are created equal, and cleaning them requires different approaches.
1. Lightning Ports (iPhones older than iPhone 15): These are somewhat easier to clean but still risky. The port is essentially a hollow oval with pins lining the sides. The danger here is scraping the pins on the bottom or sides of the cavity, which can strip the gold plating and ruin connectivity.
2. USB-C Ports (Androids and iPhone 15+): These are much trickier. In the center of a USB-C port, there is a delicate “tongue” or wafer sitting right in the middle. This tongue holds the contact pins. If you stick a tool in there and twist it, you can snap that tongue right off. If that happens, no amount of cleaning will save you; you will need a full port replacement.
The Consequence of Ignoring It
If you ignore a dirty port, the electrical current has to arc over the debris to make a connection. This generates heat. Over time, this heat can actually melt the plastic inside the port or scorch the gold pins, leading to permanent hardware failure. This is why we always recommend visiting our Repair Page if you notice your phone getting unusually hot while charging.
Section 2: Tools of the Trade – What to Use (and What to Avoid)
This is the most critical section of this guide. Using the wrong tool is the #1 reason people end up visiting our locations with broken phones.
The “Do Not Use” List (The Danger Zone)
Please, for the love of your tech, put these items down:
- Metal Safety Pins or Sewing Needles: Metal is harder than the copper and gold used in your phone’s contacts. Metal tools can scratch off the conductive coating. Worse, metal conducts electricity. If your phone is on, or even if the battery has a charge, bridging two pins with a metal needle can cause a short circuit, frying your charging IC (chip) instantly.
- Wooden Toothpicks (Sometimes): Standard toothpicks are often too thick for modern USB-C ports. Furthermore, cheap wood can snap off inside the port, leaving you with a bigger problem than when you started.
- Blowing with Your Mouth: This is a classic move—like blowing into an old Nintendo cartridge. Do not do it. Your breath contains moisture and microscopic saliva droplets. Injecting moisture into a port with live electricity leads to corrosion.
The Approved Toolkit
Here is what the pros use, and what you can find at home:
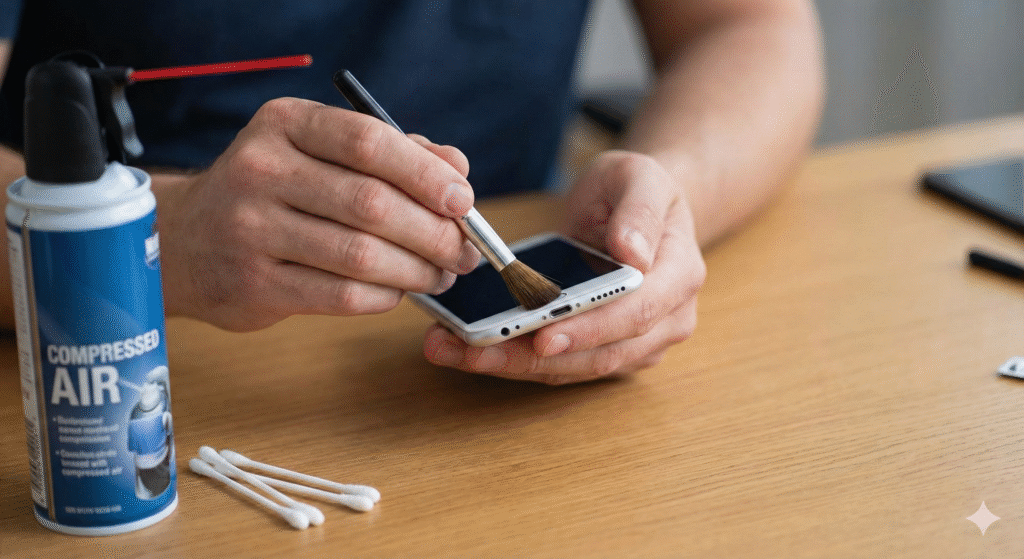
- Compressed Air (Canned Air): The safest first step. It dislodges loose dust without physical contact.
- Plastic Dental Picks / Interdental Brushes: These are fantastic. They are small, flexible, and non-conductive.
- Shaved Toothpicks: If you must use wood, shave a toothpick down to a very fine, flat point using a knife.
- Isopropyl Alcohol (99%): Do not use standard rubbing alcohol (70%) or water. You want 99% or higher because it evaporates instantly and leaves no residue.
- A Bright Light: You cannot clean what you cannot see.
Section 3: The Step-by-Step Cleaning Guide
Ready to perform surgery? Follow these steps carefully. If at any point you feel uncomfortable, remember that professional help is available. You can always Contact Us for advice.
Step 1: Turn Off Your Device
Safety first. Power down your phone completely. This minimizes the risk of short-circuiting components if you accidentally touch the wrong pins.
Step 2: The Visual Inspection
Use a flashlight or another phone’s torch to look inside the port.
- What to look for: You are looking for a buildup of grey or dark fluff at the very bottom. In a clean port, you should see the metallic bottom clearly. If it looks like a fuzzy carpet down there, that’s your culprit.
Step 3: The Air Blast
Before you touch anything, use a can of compressed air. Use the plastic straw attachment.
- Technique: Hold the can upright (holding it upside down sprays freezing liquid, which is bad). Use short, controlled bursts into the port at an angle.
- Goal: This removes the loose debris that isn’t compacted. Test your charger after this step. If it works, stop here!
Step 4: The Gentle Excavation
If air didn’t work, the lint is compacted. You need a pick.
- Take your plastic pick or shaved toothpick.
- For Lightning Ports: Insert the pick gently. Scrape the bottom of the port moving from one side to the other. Imagine you are scooping, not digging. Be extremely gentle with the sides of the port.
- For USB-C Ports: This requires extreme steady hands. Insert the pick into the gap around the center tongue. Do not lever against the center tongue. Go around the “racetrack” of the port, gently hooking out debris.
- The Result: You will likely pull out a surprising amount of lint. It’s oddly satisfying.
Step 5: The Deep Clean (Advanced)
If the port looks clear but still won’t charge, the pins might be coated in grime or oxidation.
- Wrap a tiny amount of cotton (from a cotton bud/Q-tip) around your toothpick. It needs to be a very thin layer.
- Dip it in 99% Isopropyl Alcohol. It should be damp, not dripping.
- Gently wipe the contacts inside the port. The alcohol dissolves oils and sticky residue that air can’t remove.
- Let the phone sit for 15 minutes to ensure all alcohol has evaporated before turning it on.
Section 4: Troubleshooting – When Cleaning Doesn’t Work
You’ve cleaned it. You’ve polished it. It looks brand new. But it still won’t charge. What now?
This suggests a hardware failure. Here is the diagnostic hierarchy we use at Mobile Fix Experts:
1. The Cable Test
Are you sure the cable works? Cables fray internally. Try your cable on a different device, or try a brand-new cable on your device. If you need high-quality accessories that won’t damage your battery, check out our guide on how to Buy a Device or accessories.
2. The “Wiggle” Test
Plug the charger in. Does it feel loose?
- If it feels loose after cleaning, the internal retention clips might be worn out.
- If you have to hold the cable at a specific angle to get it to charge, the solder joints connecting the port to the motherboard may have cracked. This is common in older phones or phones that have been dropped while charging.
3. Software Glitches
Sometimes, the phone’s software that manages power delivery crashes. Try a “Hard Reset” (this varies by phone model, usually a combination of Volume Up/Down and Power button).
4. The Battery Factor
If the phone detects the charger (the lightning bolt icon appears) but the percentage never goes up, your port might be fine, but your battery is dead. Batteries are consumable components; they degrade over time.
When to Call the Pros
If you are experiencing loose ports, heat generation, or zero response after cleaning, it is time for a professional repair. Charging port replacements involve micro-soldering or complex disassembly. This is not a DIY job for 99% of people.
At Mobile Fix Experts, we specialize in these repairs. We can diagnose if it’s the port, the battery, or the motherboard.
- Need a repair? Visit: https://mobilefixexperts.com/repair-a-device/
- Is the phone too old to fix? Sometimes the repair costs more than the phone is worth. In that case, you might want to sell it for parts. Check out: https://mobilefixexperts.com/sell-a-device/
Conclusion
A dirty charging port is the silent killer of smartphone batteries. It is a minor annoyance that, if left unchecked, can lead to expensive repairs. By making port maintenance a regular part of your routine—perhaps once every few months—you can extend the lifespan of your device significantly.
Remember the golden rules:
- No metal tools.
- No moisture.
- Be gentle.
If you have followed this guide and your device is back up and running, congratulations! You just saved yourself a trip to the repair shop. If you are still stuck in the dark with a dead battery, don’t force it. The team at Mobile Fix Experts is here to help you get reconnected.
Check out our About Us page to learn more about our commitment to keeping your tech running longer.
FAQs
Q1: Can I use a needle to clean my charging port?
A1: No. Absolutely not. Using a needle is dangerous for two reasons: it can scratch the gold plating off the charging pins, ruining the connection, and it can cause an electrical short circuit if the battery has any charge left, potentially frying your phone’s motherboard. Always use non-conductive tools like plastic or wood.
Q2: Why does my charger fall out so easily?
A2: This is the classic symptom of compacted lint. As you carry your phone in your pocket, lint enters the port. Every time you plug in your charger, you pack that lint down to the bottom. Eventually, the layer of lint becomes so thick that the plug cannot go all the way in to engage the locking clips. A thorough cleaning usually fixes this.
Q3: Can I use hand sanitizer to clean the port?
A3: It is not recommended. While hand sanitizer contains alcohol, it often contains water, gels, fragrances, and moisturizers (like aloe) that leave a sticky residue behind. This residue can actually attract more dust later or insulate the pins, preventing charging. Stick to 99% Isopropyl alcohol.
Q4: How much does it cost to replace a charging port if I break it?
A4: The cost varies significantly depending on the device. For an older iPhone, it might be $50-$80. For newer Samsungs or iPhones where the repair involves removing the screen (which is risky), it can be upwards of $100-$150. Cleaning it safely is free; rushing the cleaning process can be expensive.
Disclaimer
The information provided in this post is for educational purposes only. Mobile Fix Experts is not responsible for any damage caused to your device while attempting to clean or repair it yourself. If you are unsure about performing these steps, please consult a professional technician.